Fitting data into a cell can be tricky, but with a few simple tricks and tips, you can fit the data into the size and shape of cell that you want.
Resize your columns. You can change the width of an individual column (or row height) by moving your mouse pointer to the line between the column letters(or row numbers). Left click and drag to resize. To resize all the columns at once, highlight the whole sheet (click the top left-hand corner of the sheet) and then resize a column. To auto size a column double left click, this will make the column as wide as it needs to be to fit in all the data. This works when you have highlighted the whole sheet, so is the fastest way to get the right fit for all the columns at once.
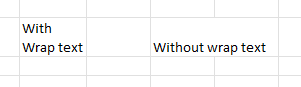
Sometimes, you have text in a column that is wider than you want the column to be. This is where wrap text comes in handy. You can force the data to flow down the cell, making the row higher to accommodate.
You can choose where the data sits in the cell: Top, centered, bottom; left, centered, right. This works for text, numbers, or dates. The default is that numbers will be Algin Right. If your numbers are small, only one or two digits, and they are in amongst other data, it can make them hard to read. Centering them can make a big difference to the readability of your data.